
Billing & Plans
Your plan tier determines which features your brand can use and how many locations you can manage — view your current plan, entitlements, and billing details in Settings → Billing.
When you’d use this
Section titled “When you’d use this”- Checking which features your current plan includes
- Understanding what a trial gives you access to before committing
- Adding or updating payment information
Plan tiers
Section titled “Plan tiers”KynectLocal has three plan tiers. Each tier includes everything in the tier below it.
| Tier | Best for | Key additions |
|---|---|---|
| Local | Single-location or small networks getting started | Core pages, templates, business profile, content zone editor |
| Network | Growing networks that need consistent brand control | Governance (field locking), service pages, scheduled template assignments, reporting |
| Authority | Large networks requiring advanced automation and integrations | AI credits, advanced analytics, API access, webhooks, priority support |
Feature entitlements
Section titled “Feature entitlements”An entitlement is your brand’s authorization to use a specific feature. Entitlements come from two sources:
- Plan tier — permanent access included with your subscription
- Trial — 30-day time-limited access to a paid feature
If you try to use a feature your plan doesn’t include, KynectLocal returns a clear message telling you which tier is required. You won’t be charged or auto-upgraded without your action.
Trials
Section titled “Trials”When a new brand is created in KynectLocal, a 30-day trial starts automatically. The trial gives you access to features above your current plan tier so you can evaluate them before deciding whether to upgrade.
After a trial feature expires:
- Pages and content built with that feature remain intact
- You lose the ability to edit or publish using that feature until you upgrade
- Upgrading your plan restores access immediately
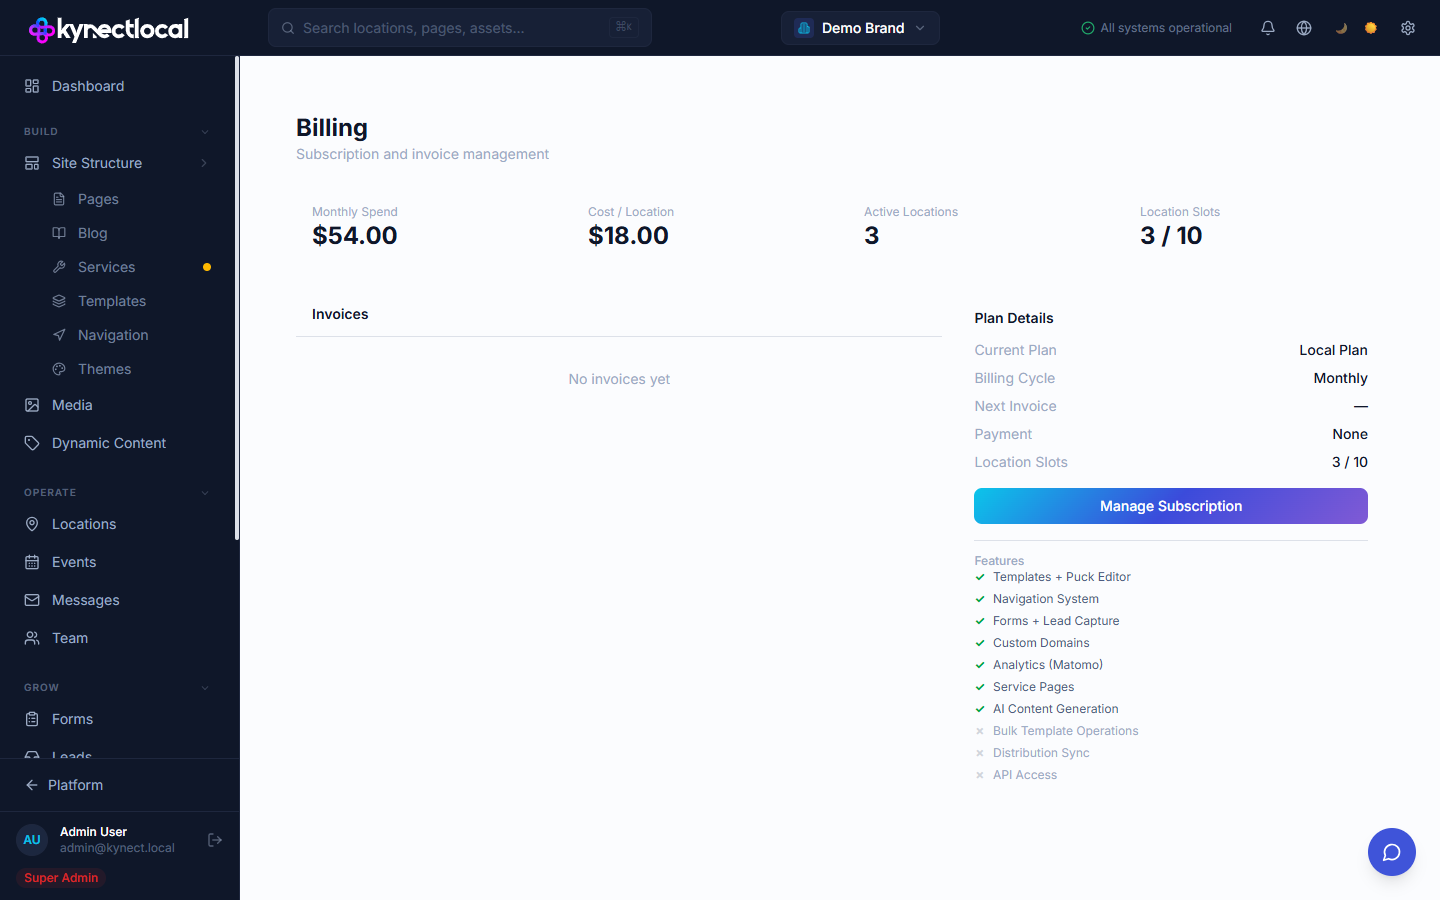
Billing overview
Section titled “Billing overview”
The Billing page shows:
- Your current plan tier and renewal date
- Active trials and their expiry dates
- Payment method on file
- Invoice history
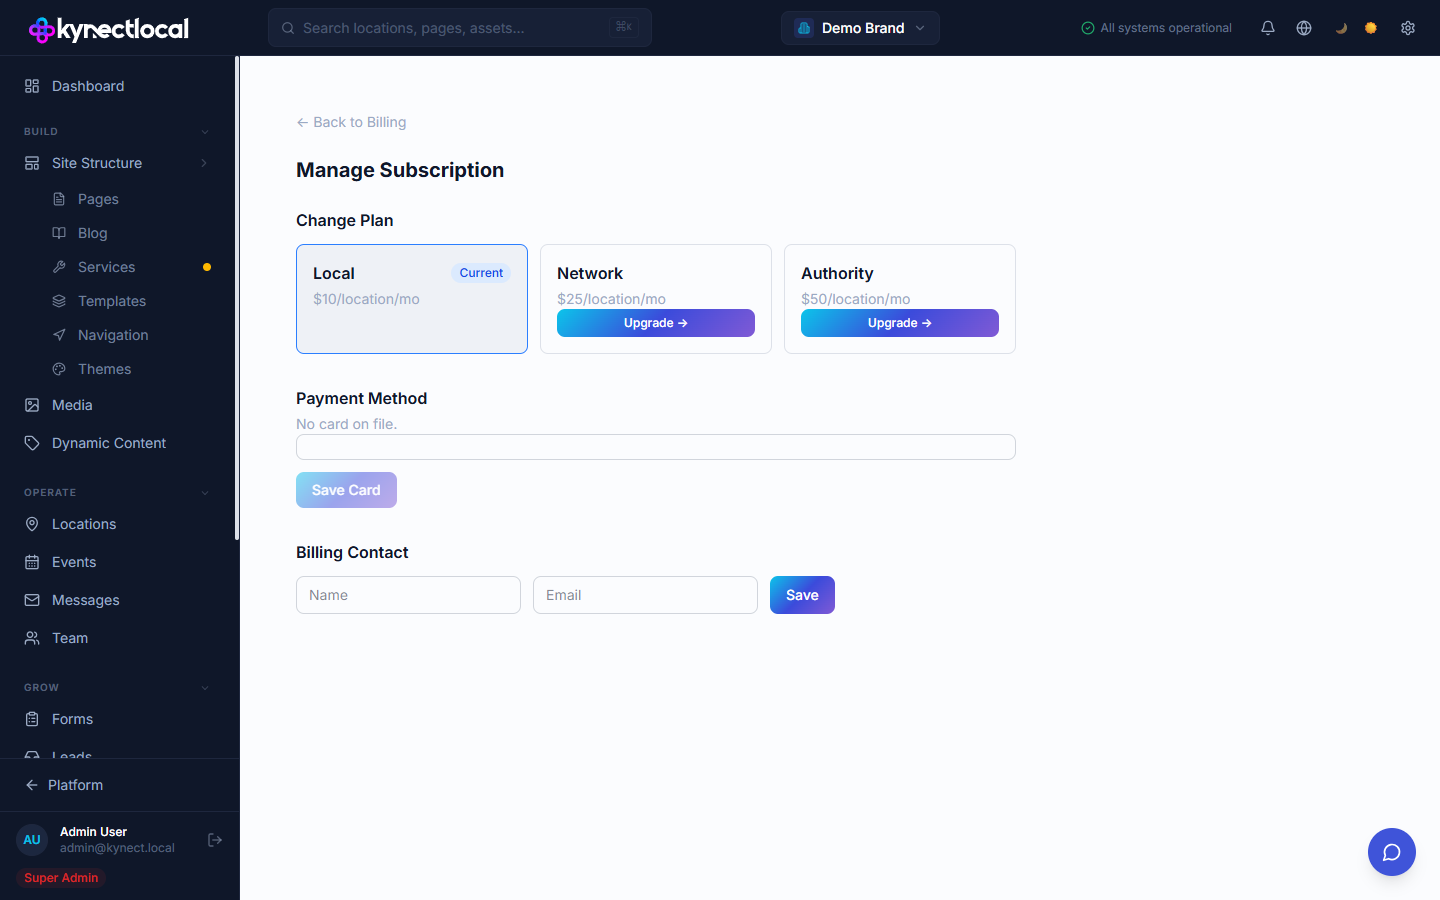
Adding payment details
Section titled “Adding payment details”- Go to Billing → Manage Subscription.
- Under Payment Method, click Add Payment Method.
- Enter your card details in the form that appears.
- Click Save Card.
Once saved, your card appears as Visa •••• [last 4 digits] with the expiry date.
To update an existing card, click Update next to the saved card and repeat steps 3–4.
Your card is charged on your next renewal date. Adding a payment method does not immediately charge you.
Related
Section titled “Related”- Account & Users — seat counts and user limits depend on your plan tier
- Templates — scheduled assignments require the Network tier or above