
Forms
Forms are the contact and lead-capture forms embedded on your location pages. As a brand admin, you control the form structure — which fields appear, what they’re labelled, and which fields are required. Franchisees control only where submissions are routed (their notification email address).
Submissions captured by forms appear in Leads.
When you’d use this
Section titled “When you’d use this”- Adding a “Request a Quote” or “Contact Us” form to location pages
- Updating the fields on an existing form (adding a phone number field, making a field required)
- Reviewing which forms are active across your network
The Forms admin
Section titled “The Forms admin”Go to Grow → Forms to manage your brand’s form library.
Each form shows its name, the number of fields it contains, and which pages it’s currently embedded on.
Creating a form
Section titled “Creating a form”- Click + New Form.
- Enter a form name (used internally — not shown to visitors).
- Add fields using the field builder. For each field, set:
- Label — the text shown to the visitor
- Field type — Text, Email, Phone, Select, Textarea, Checkbox
- Required — whether the visitor must fill in the field before submitting
- Set the Submit button label (e.g. “Send Message”, “Request a Quote”).
- Click Save.
To embed the form on a page, add a Form block in the Puck editor and select the form by name.
Editing a form
Section titled “Editing a form”Click the form name to open the field builder. Changes take effect immediately on all pages where the form is embedded — no republish needed.
Mailchimp audience selection
Section titled “Mailchimp audience selection”When Mailchimp is connected, each form can push submissions to a specific Mailchimp audience. This is configured per-form — different forms can route to different audiences.
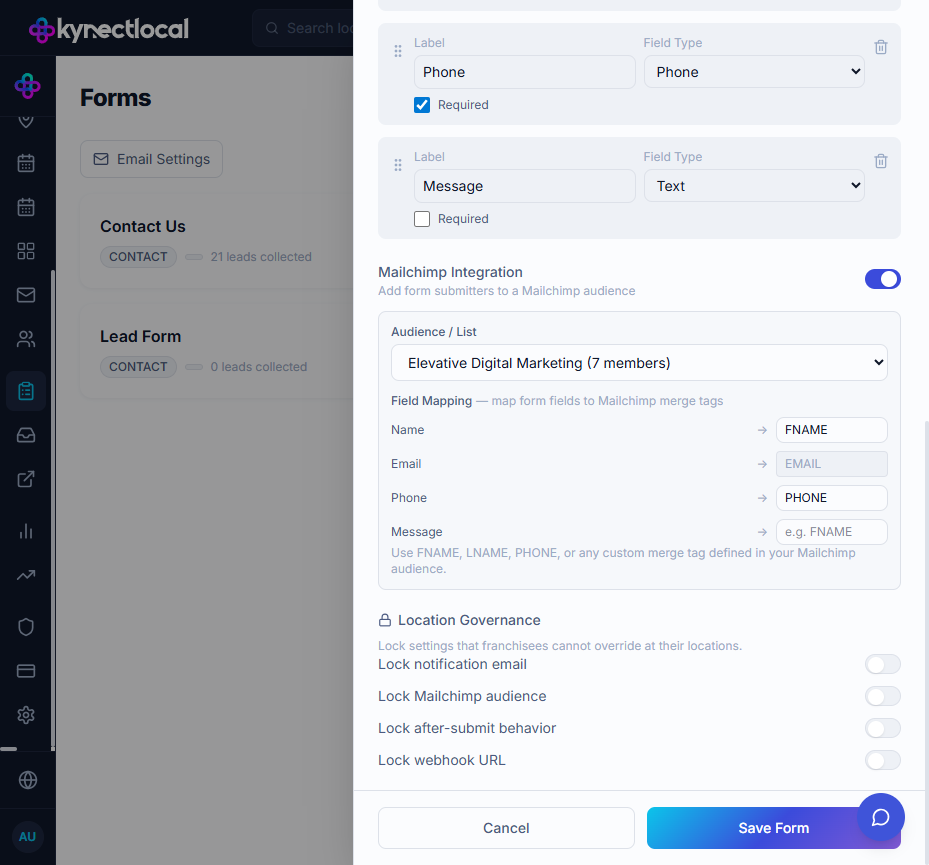
To configure a form’s Mailchimp audience:
- Click Edit on a form.
- Scroll to Mailchimp Integration and toggle it on.
- Select an audience from the Audience / List dropdown. The dropdown shows all audiences in the connected Mailchimp account with their current member counts.
- In the Field Mapping table, map each form field to a Mailchimp merge tag (e.g.
FNAME,PHONE, a custom tag). The Email field is always mapped toEMAILand cannot be changed. - Click Save Form.
Where submissions go
Section titled “Where submissions go”Submissions are stored as Leads in the Leads admin and also emailed to each location’s notification address. Franchisees set their notification email under Settings → Notifications in their location dashboard.
Related
Section titled “Related”- Mailchimp — connect Mailchimp and understand how audience IDs work
- Leads — view and manage form submissions across your network
- Pages & Content (Puck) — embed forms on location pages using the Form block
- Managing Forms — franchisee instructions for routing form submissions