
Mailchimp
The Mailchimp integration subscribes every KynectLocal form submission to a Mailchimp audience. Each form can target a different audience, and franchisee locations can optionally connect their own Mailchimp account so leads push to both the brand account and the location’s account simultaneously.
How it works
Section titled “How it works”- Trigger: A visitor submits a form on any location page.
- Action: KynectLocal queues a push job that calls the Mailchimp Members API.
- Result: The submitter is added as a subscriber to the configured audience. If the email already exists in that audience, the existing subscriber is updated — no duplicates are created.
- Visibility: Push activity is logged on the Mailchimp detail page.
Brand admin setup
Section titled “Brand admin setup”1. Navigate to Integrations
Section titled “1. Navigate to Integrations”Go to Grow → Integrations in the left sidebar.
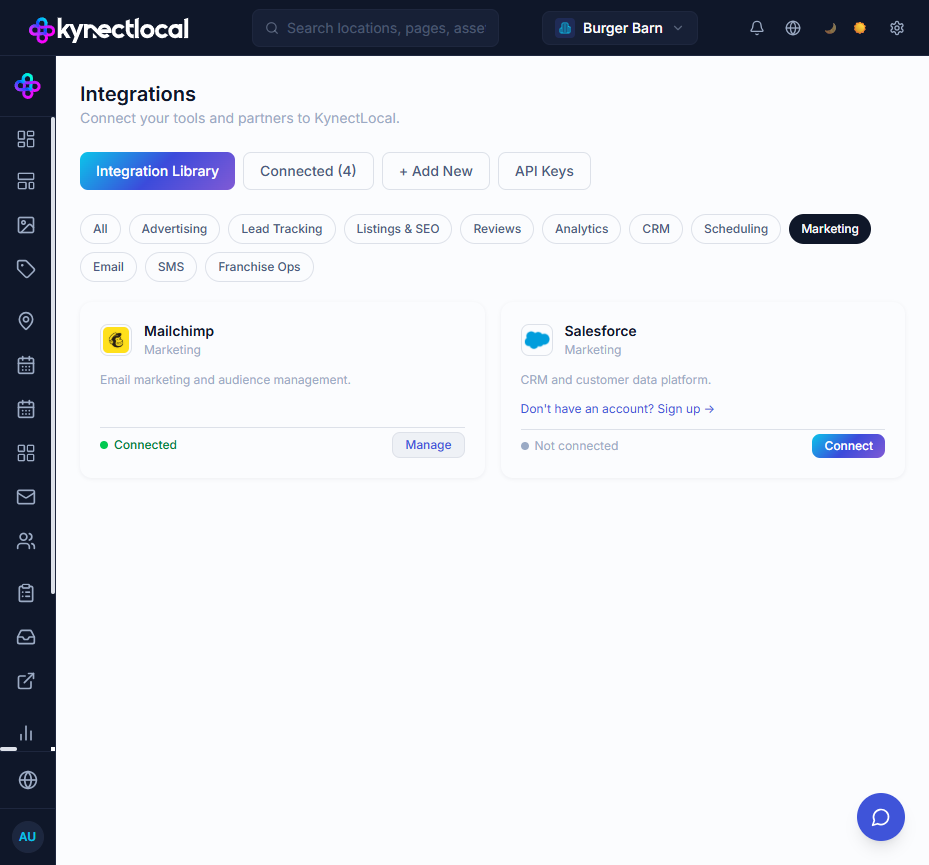
Mailchimp appears in the Marketing category. If it shows Not connected, click Connect to open the credentials modal.
2. Enter your API key
Section titled “2. Enter your API key”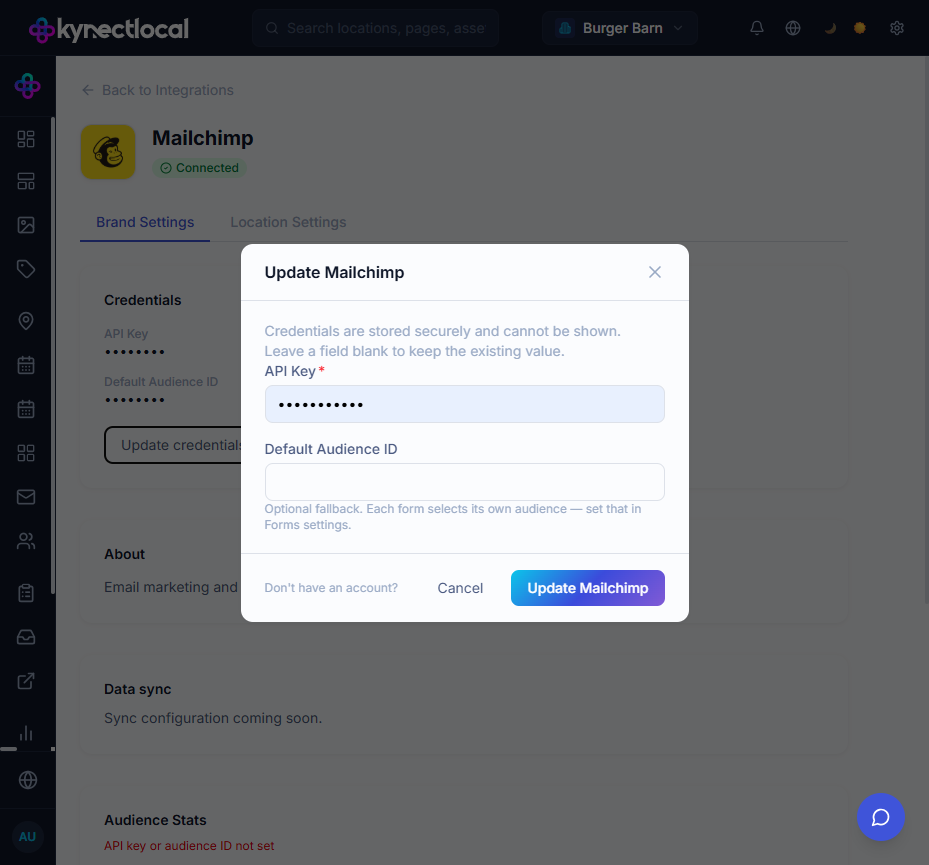
Click Connect (or Update credentials if already connected). Two fields appear:
| Field | What to enter |
|---|---|
| API Key | Your Mailchimp API key — see below for where to find it |
| Default Audience ID | Optional. A fallback audience used only when a form has no audience configured |
Finding your API key in Mailchimp:
- Log in to mailchimp.com and open your account.
- Click your profile icon → Account & billing.
- Go to Extras → API keys.
- Click Create A Key, give it a name (e.g. “KynectLocal”), and copy the key.
Finding your Audience ID:
- In Mailchimp, go to Audience → Manage Audience → Settings.
- Scroll to Audience ID — it is a short alphanumeric string (e.g.
a1b2c3d4e5).
Click Update Mailchimp to save. KynectLocal encrypts the API key before storing it.
3. Confirm the connection
Section titled “3. Confirm the connection”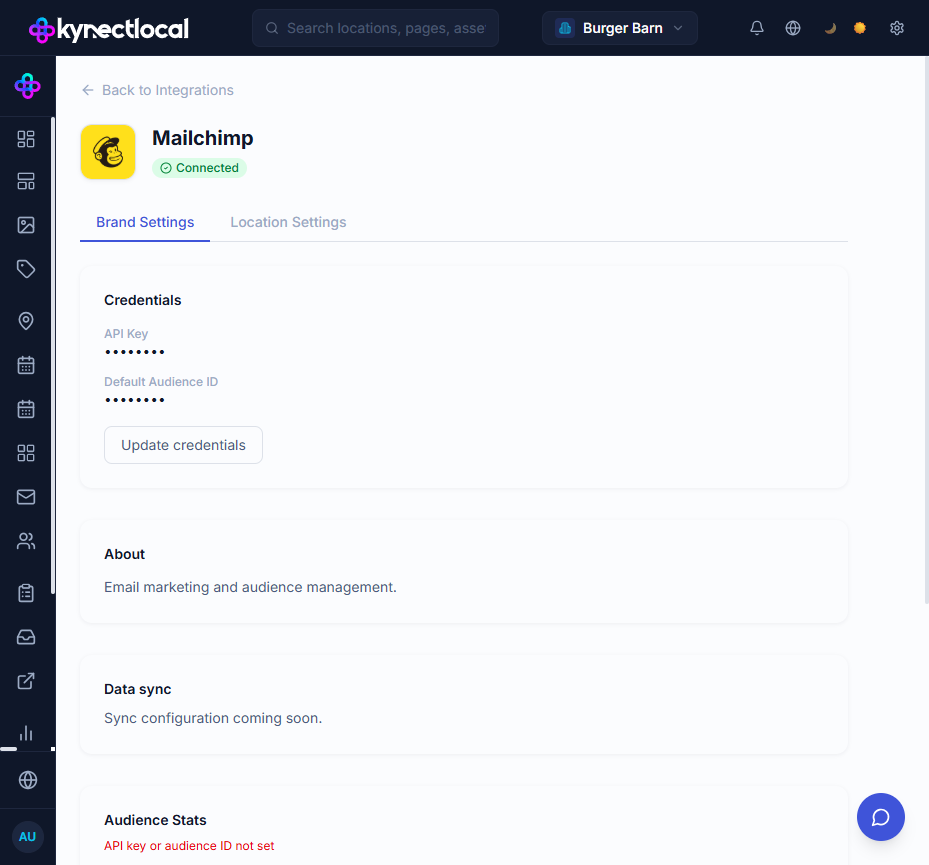
The detail page opens with the Brand Settings tab active. A green Connected badge confirms the key was accepted. The stored API key and Default Audience ID are shown as masked dots — click Update credentials any time to change them.
Connecting a form to a Mailchimp audience
Section titled “Connecting a form to a Mailchimp audience”Each form independently selects which Mailchimp audience to push leads to.
- Go to Grow → Forms.
- Click the Edit icon next to the form you want to configure.
- Scroll down to the Mailchimp Integration section.
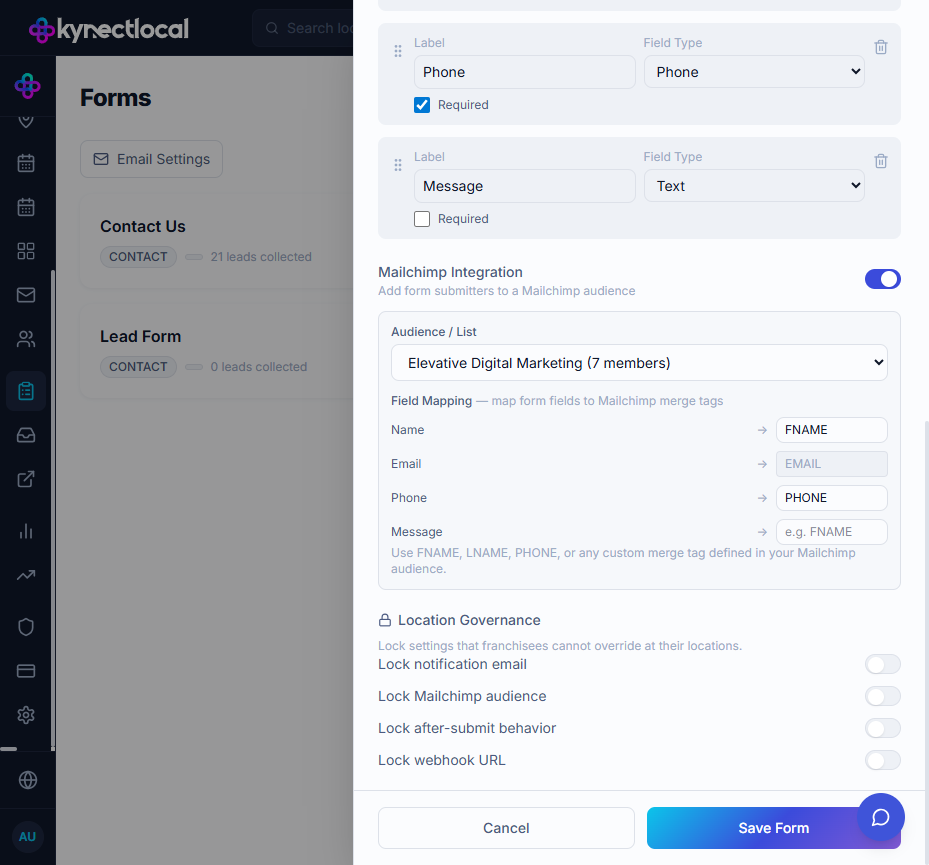
- Toggle Mailchimp Integration on.
- Select an audience from the Audience / List dropdown. The dropdown lists all audiences in your connected Mailchimp account with their current member counts.
- In the Field Mapping table, map each form field to a Mailchimp merge tag:
| Form field | Typical merge tag |
|---|---|
| Name | FNAME or a custom tag |
EMAIL (pre-filled, cannot be changed) | |
| Phone | PHONE |
| Message | Leave blank or map to a custom tag |
- Click Save Form.
Franchisee location-level setup (optional)
Section titled “Franchisee location-level setup (optional)”Franchisees can add their own Mailchimp API key so that leads from their location push to both the brand’s Mailchimp account and their own simultaneously.
- Log in as a franchisee and select your location.
- Go to Grow → Integrations (the My Integrations page).

- Find the Mailchimp card. It shows Brand Connected to indicate the brand has already connected at the brand level.
- Enter your own API Key in the field shown.
- Optionally enter a Default Audience ID for your location’s Mailchimp account. This is used when no form-level audience is configured.
- Click Save.
Once saved, the API Key field displays a hint (the first several characters of the key followed by dots) and a Change button for updating it later.
Brand admin: viewing location keys
Section titled “Brand admin: viewing location keys”Brand admins can see and edit every location’s saved credentials from the Location Settings tab on the Mailchimp detail page.
- Go to Grow → Integrations → Mailchimp → Manage.
- Click the Location Settings tab.
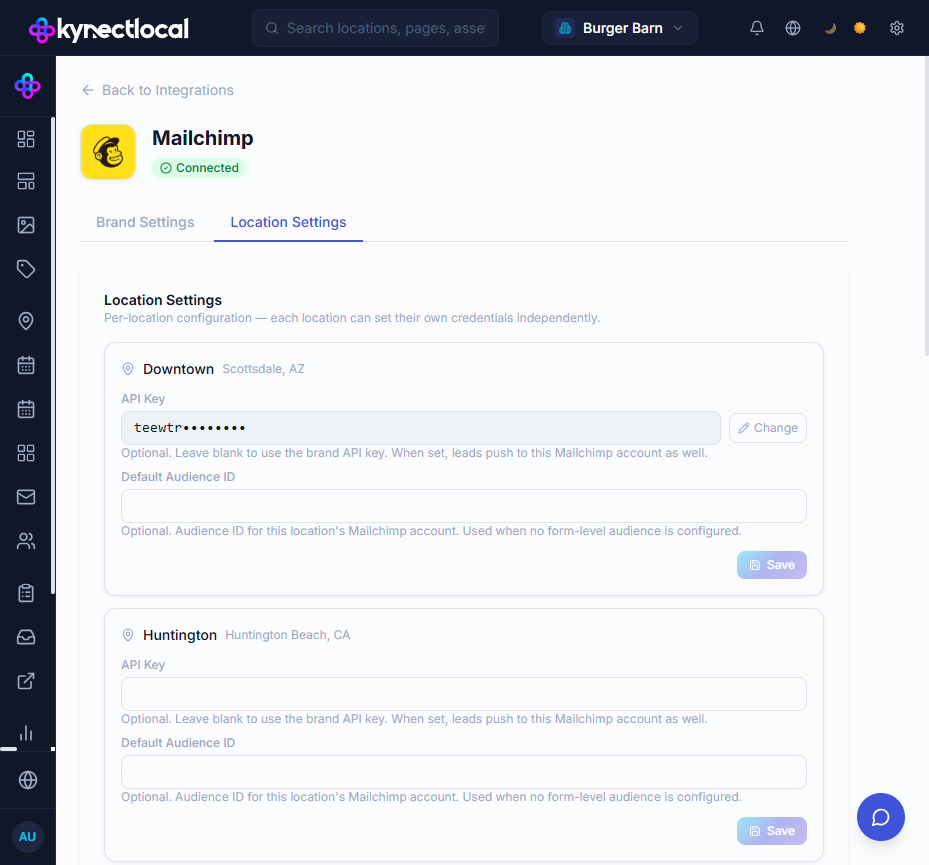
Each location row shows:
- API Key — masked hint if a key has been saved, or an empty field if not set
- Change button — click to update the key for that location on the franchisee’s behalf
- Default Audience ID — optional per-location fallback audience
Audience stats and reporting
Section titled “Audience stats and reporting”Digital Impact — Email Marketing zone
Section titled “Digital Impact — Email Marketing zone”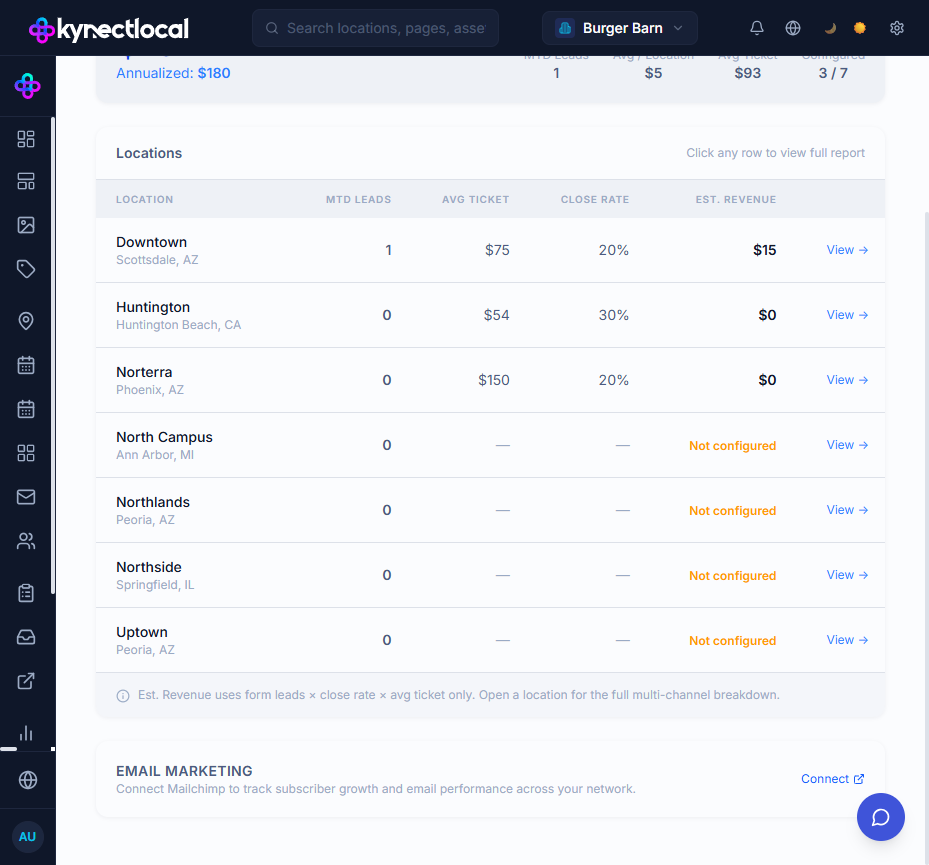
The Digital Impact page (Measure → Digital Impact) includes an Email Marketing zone at the bottom of the page. When Mailchimp is connected and data is available, the zone shows:
- Total subscribers across all lists
- Average open rate
- Estimated Email Revenue (modeled: subscribers × open rate × 2% conversion × avg ticket)
- A Recent Campaigns table (when a specific audience ID is configured)
Click Connect → in the zone to go directly to Mailchimp integration settings.
Analytics — Email tab
Section titled “Analytics — Email tab”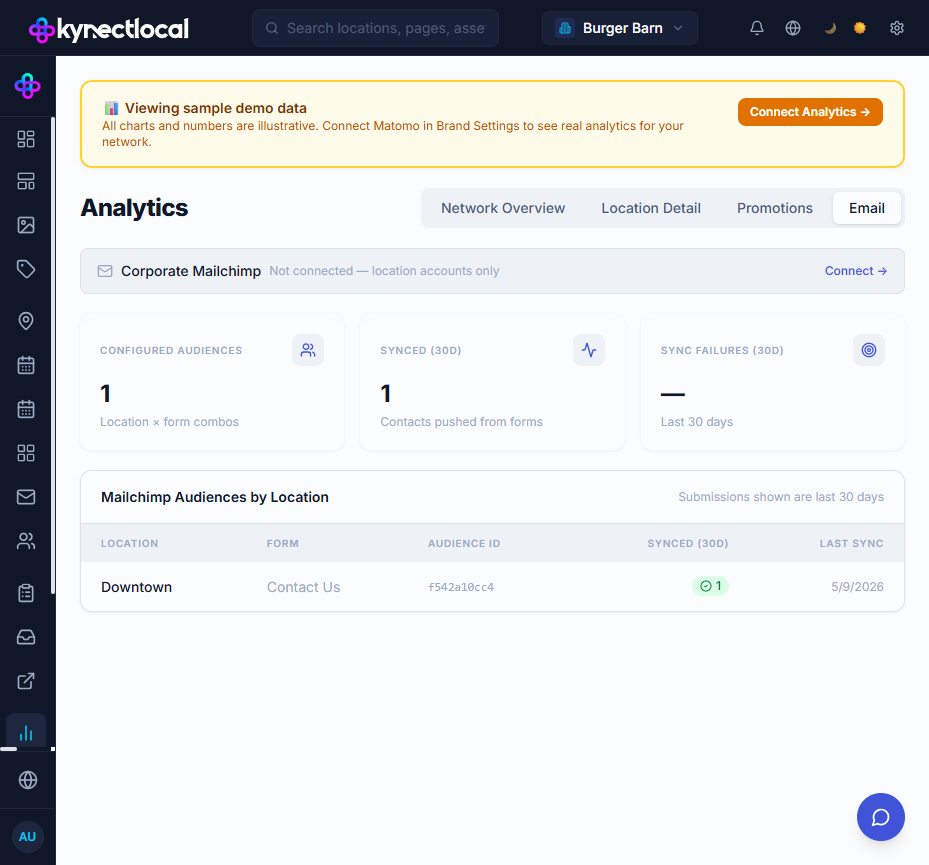
Go to Measure → Analytics and click the Email tab. This tab shows network-wide Mailchimp sync status and does not require a corporate (brand-level) Mailchimp connection to be useful — location accounts appear in the table regardless.
- Corporate Mailchimp banner — shows brand connection status. Click Connect → to set up the brand-level account.
- Configured Audiences — number of location × form combinations with a Mailchimp audience selected
- Synced (30d) / Sync Failures (30d) — push counts for the last 30 days
- Mailchimp Audiences by Location table — one row per configured location × form, showing the Audience ID, sync count, and last sync date
The Audience ID column displays the raw 10-character Mailchimp list ID (e.g. f542a10cc4). This matches the ID shown in the Mailchimp dashboard under Audience → Settings → Audience ID.
How a lead gets subscribed
Section titled “How a lead gets subscribed”- A visitor submits a form on a location page.
- KynectLocal creates a lead record.
- A push job fires and calls the Mailchimp Members API for the configured audience.
- If the email address is new to that audience, a subscriber is added.
- If the email already exists in the audience, the subscriber record is updated — no duplicate is created.
- The push result (success or error) is logged under Recent Activity on the Mailchimp detail page.
Troubleshooting
Section titled “Troubleshooting”| Symptom | Cause | Fix |
|---|---|---|
| Push logged as “No audience configured” | The form has no audience selected and no Default Audience ID is set at the brand level | Select an audience in the form’s Mailchimp Integration section, or set a Default Audience ID in brand credentials |
| Push logged as “Integration not connected” | No API key has been saved at the brand level | Go to Integrations → Mailchimp → Update credentials and enter a valid API key |
| Audience dropdown is empty when editing a form | The API key was entered incorrectly or the Mailchimp account has no audiences | Verify the key in Mailchimp → Extras → API keys, then update credentials |
| Credential hint shows the wrong key | The key was replaced; the hint reflects what was last saved | Click Update credentials (brand) or Change (location) and re-enter the correct key |
| Franchisee location pushes succeed to brand but fail to location | The location’s API key is invalid or belongs to a different Mailchimp account | Have the franchisee update their key on the My Integrations page |
Related
Section titled “Related”- My Integrations — franchisee guide to adding location-level credentials
- Forms — creating and configuring forms
- Leads — viewing form submissions
- API Key Security — how credentials are encrypted and stored